How to Add Chapters to a Video using FFMPEG - Part One - The Basics
Sun Aug 01 2021 • Uncategorized
This is the first post in the series involving the creation of chapters using FFMPEG.
- Part 1 - How to Add Chapters to a Video using FFMPEG - Part One - The Basics
- Part 2 - How to Add Chapters to a Video using FFMPEG - Part Two - C# Script
- First of all, let's use FFMPEG itself create a 6 minute long test video:
ffmpeg -f lavfi -i color=c=red@0.2:duration=360:s=1280x720:r=10 6min720p.mp4- Next, create a file called
metadata.txtand add the following contents to it:
;FFMETADATA1
title=Adding Chapters using FFMPEG
artist=Terry Butler

[CHAPTER]
TIMEBASE=1/1000
# Chapter 1 starts at 00:00
START=0
# Chapter 1 ends at 02:30 (minus 1 millisecond)
END=149999
title=Chapter 1

[CHAPTER]
TIMEBASE=1/1000
# Chapter 2 starts at 02:30
START=150000
# Chapter 2 ends at 04:45 (minus 1 millisecond)
END=284999
title=Chapter 2

[CHAPTER]
TIMEBASE=1/1000
# Chapter 3 starts at 04:45
START=285000
# Chapter 3 / end of file ends at 06:00 (minus 1 millisecond)
END=360000
title=Chapter 3
It's worth noting that the START and END times are based on milliseconds in this case so you must multiply seconds * 1000.
Also the END of a chapter must be one millisecond less than the START of the next. This is to ensure no overlapping boundaries.
- Finally we use FFMPEG to read the video in along with the metadata we created in the previous step (
metadata.txt) to create a brand new outfile file complete with new chapters:
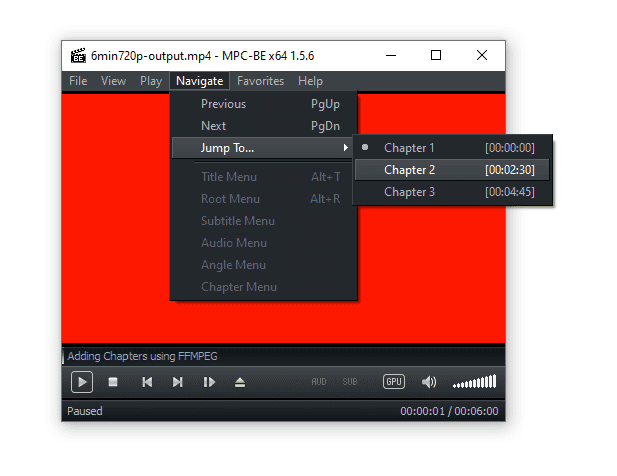
ffmpeg -i ./6min720p.mp4 -i metadata.txt -map_metadata 1 -codec copy ./6min720p-output.mp4- Opening the file in a media player that supports chapters should show the following:
See here for further reading: https://ffmpeg.org/ffmpeg-formats.html#Metadata-1


